Authorization in practice
Introduction
This tutorial guides you through the Authorization Code Grant flow, which is typical for server-side apps. As an example, we'll show you how to list chats using the Agent Chat Web API.
Together, we'll go through the following steps:
Configuring the Authorization building block of your app
Acquiring the code
Exchanging the code for an access token
Sending a request
Before you start
Make sure you have:
- a LiveChat Owner or Admin account. Sign up for free if you don't have it.
- a server-side application in Developer Console. Find out how to create one.
- correct scopes for the selected method. See documentation.
- any tool that will allow you to send requests (Postman, terminal, etc.)
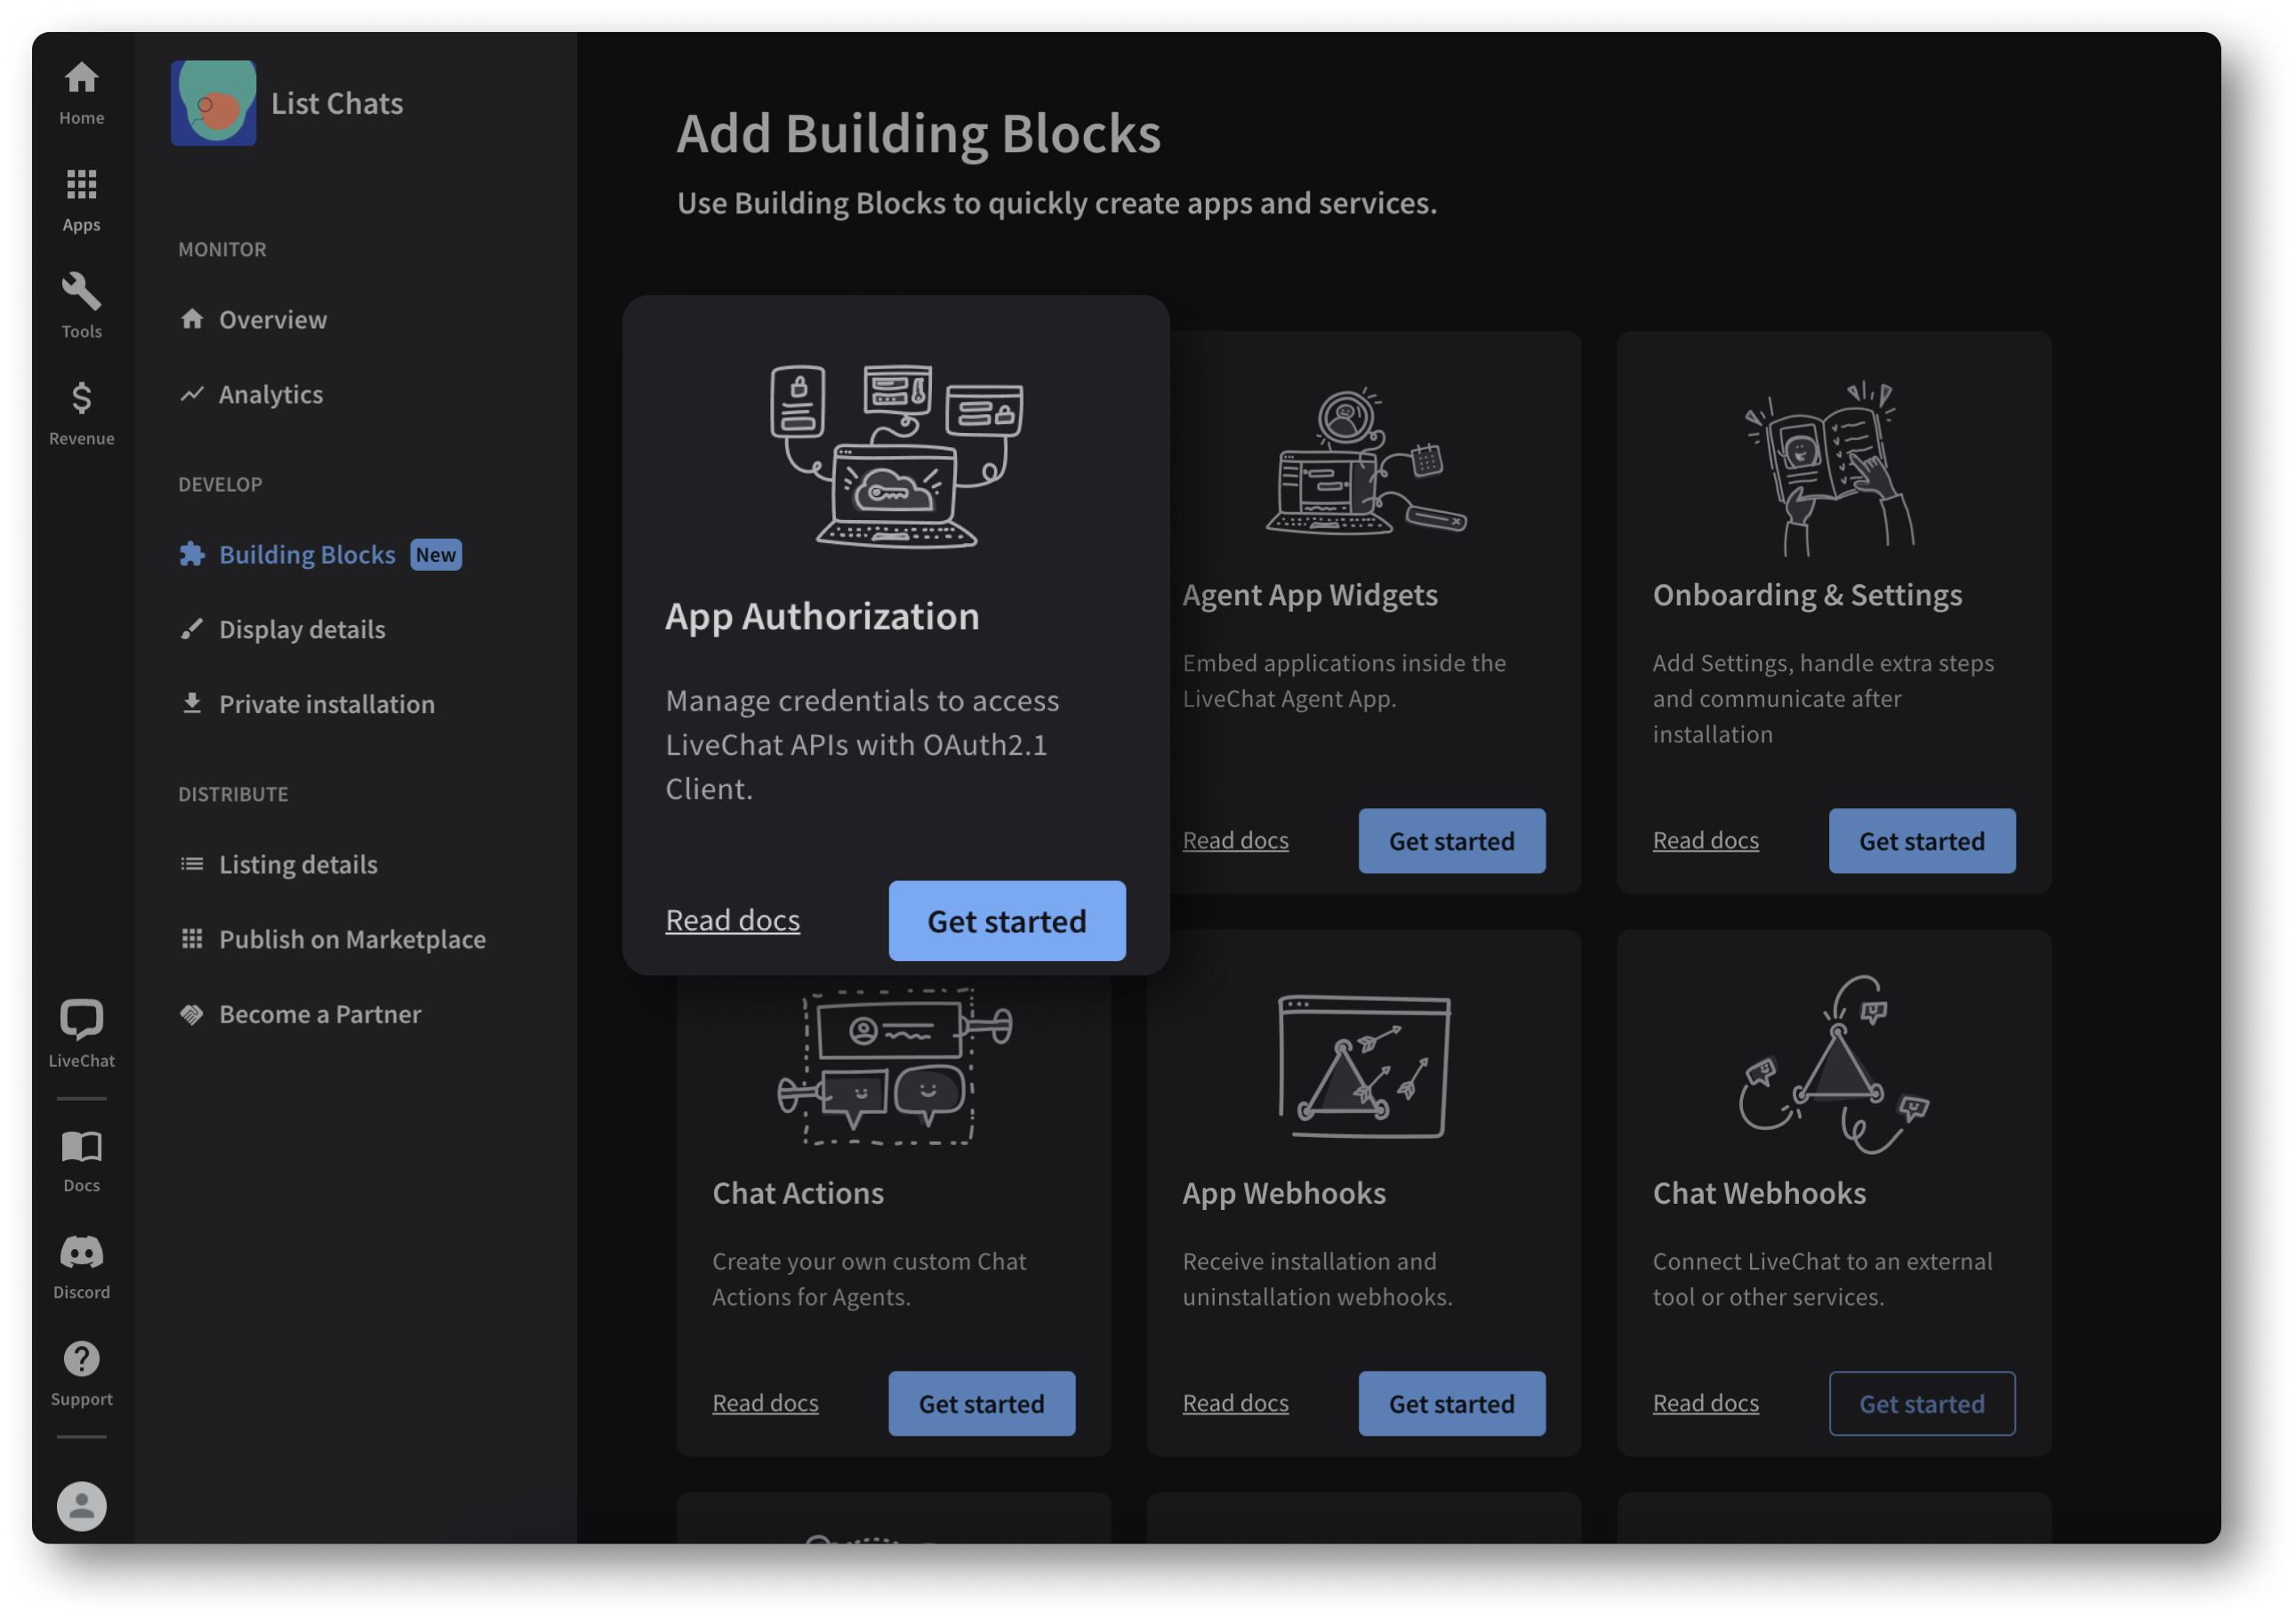
Step 1 Configure the Authorization building block
To use any method from the Agent Chat, Customer Chat, and Configuration API, your app needs to have an Authorization building block. This is where you'll configure authorization details.
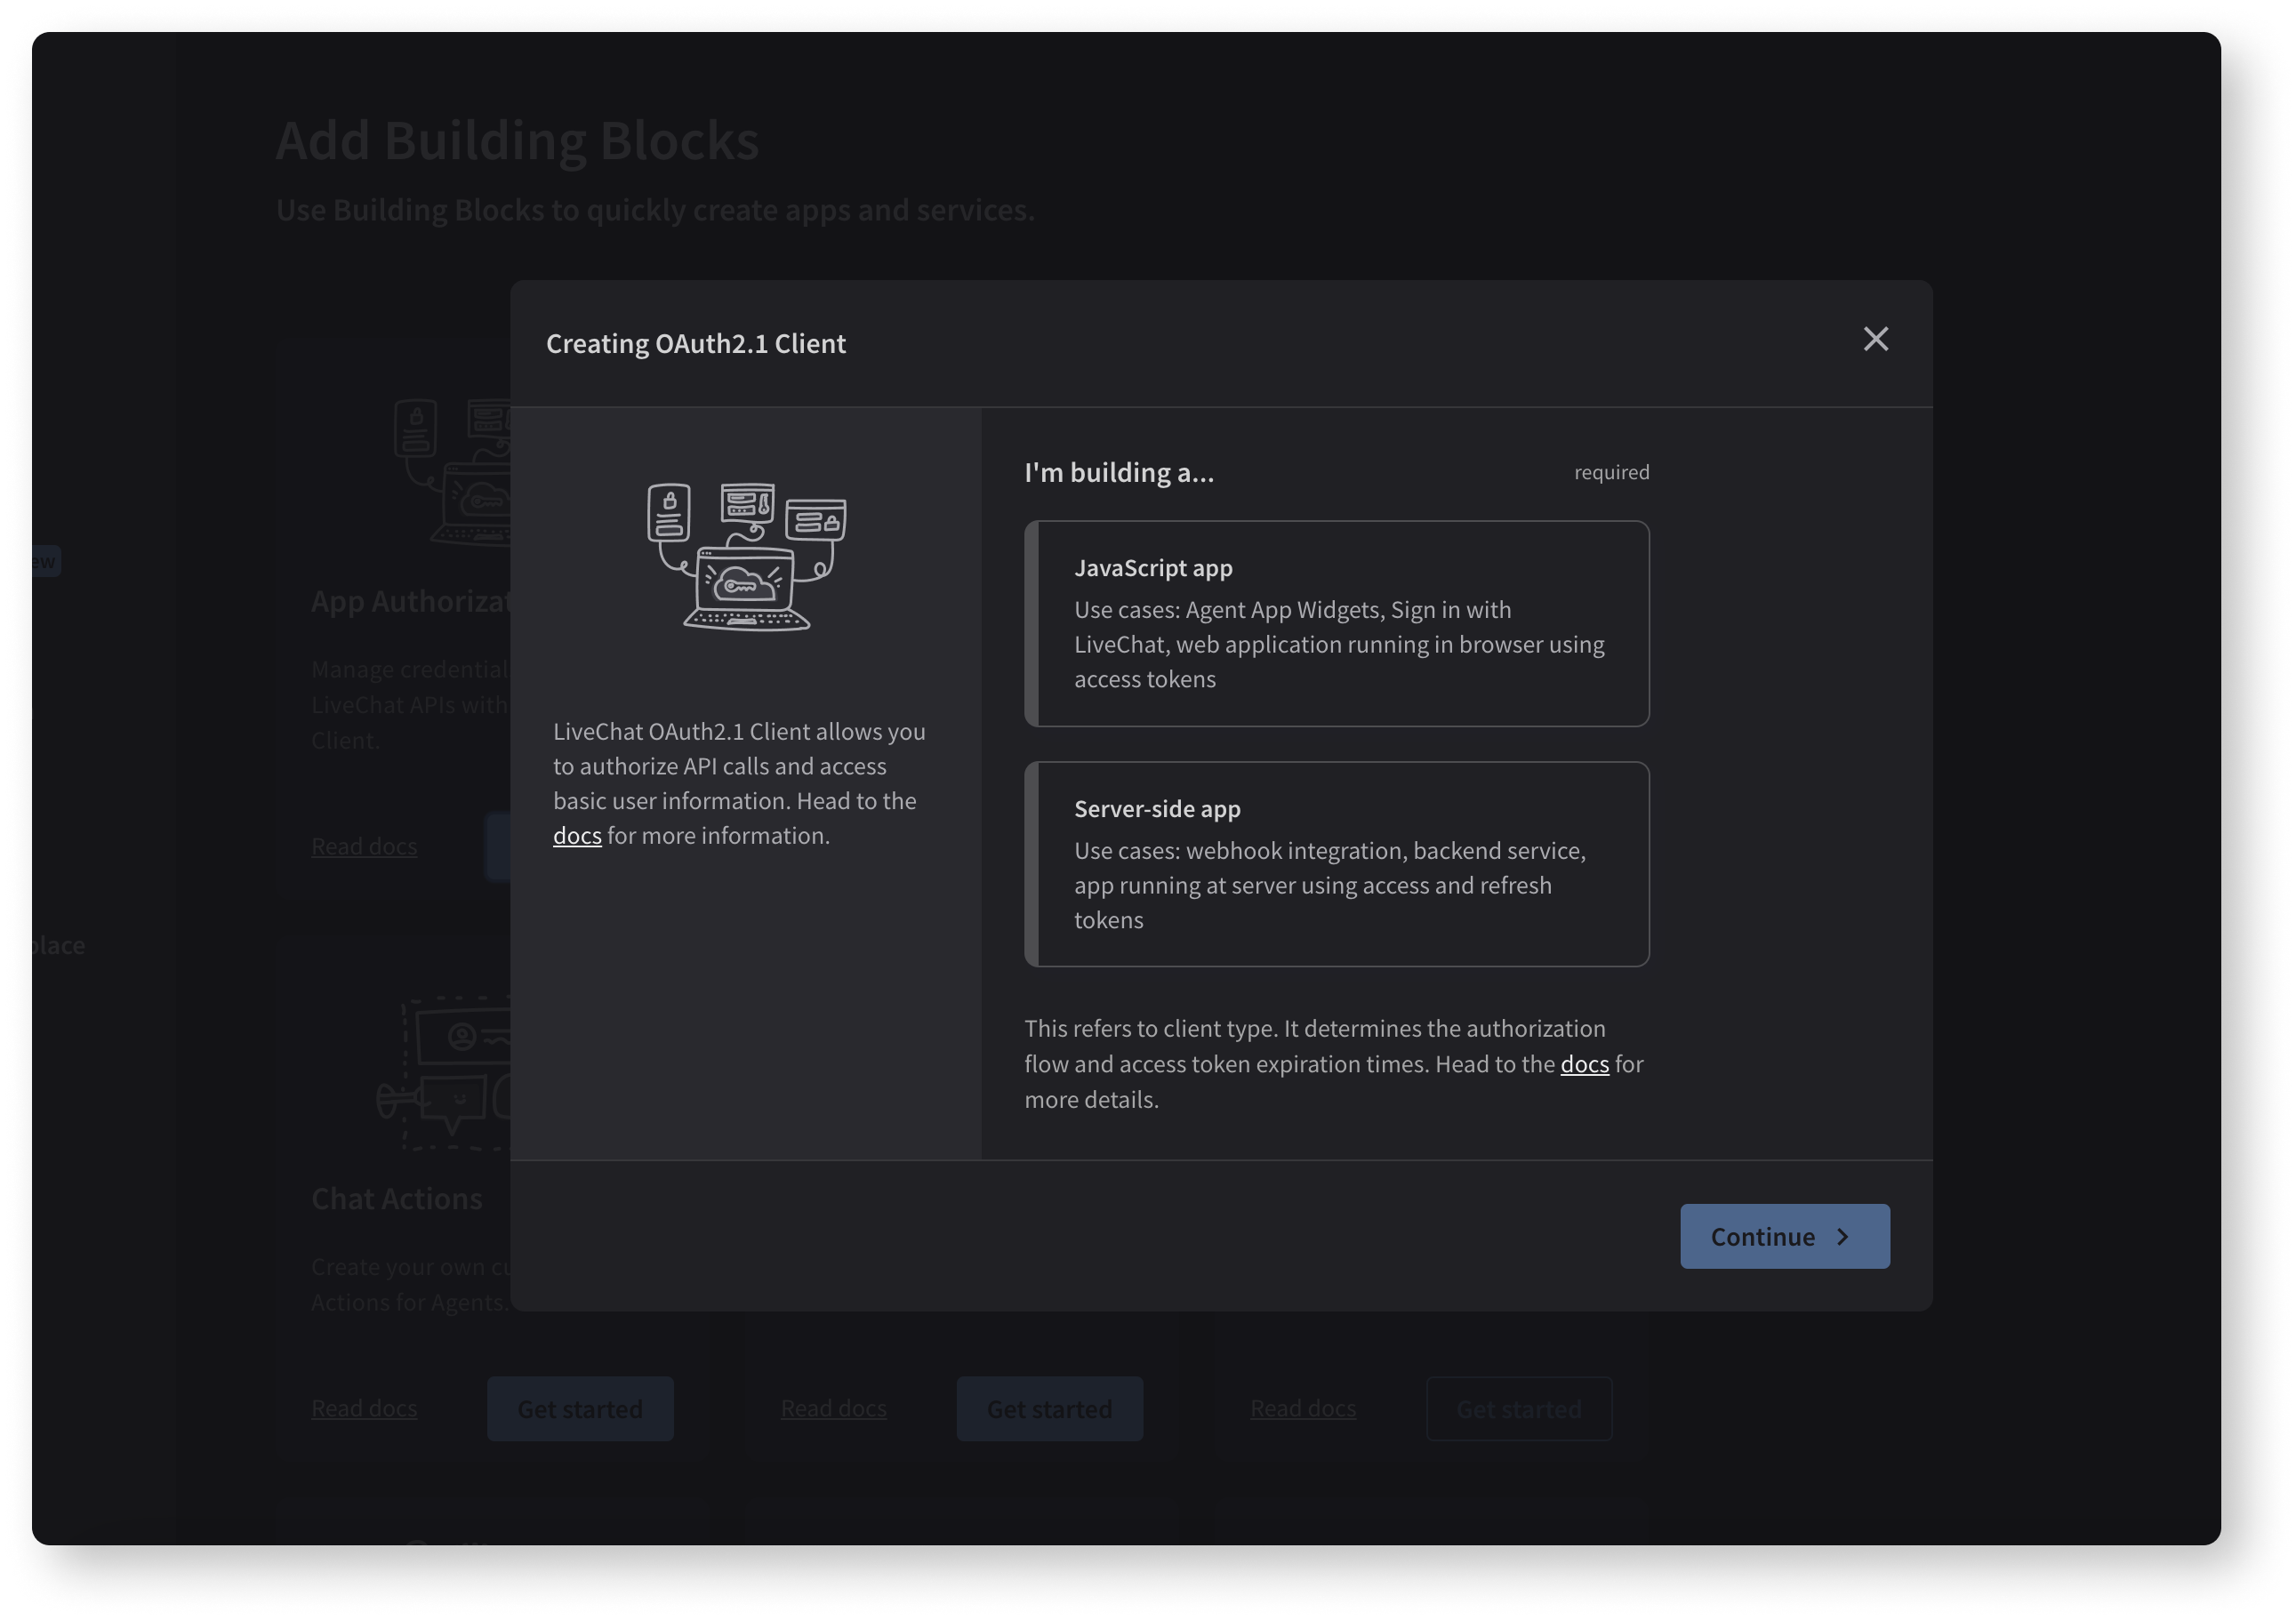
However, before that, you must decide if you are building a JavaScript or server-side app. We will use the server-side app in our guide.
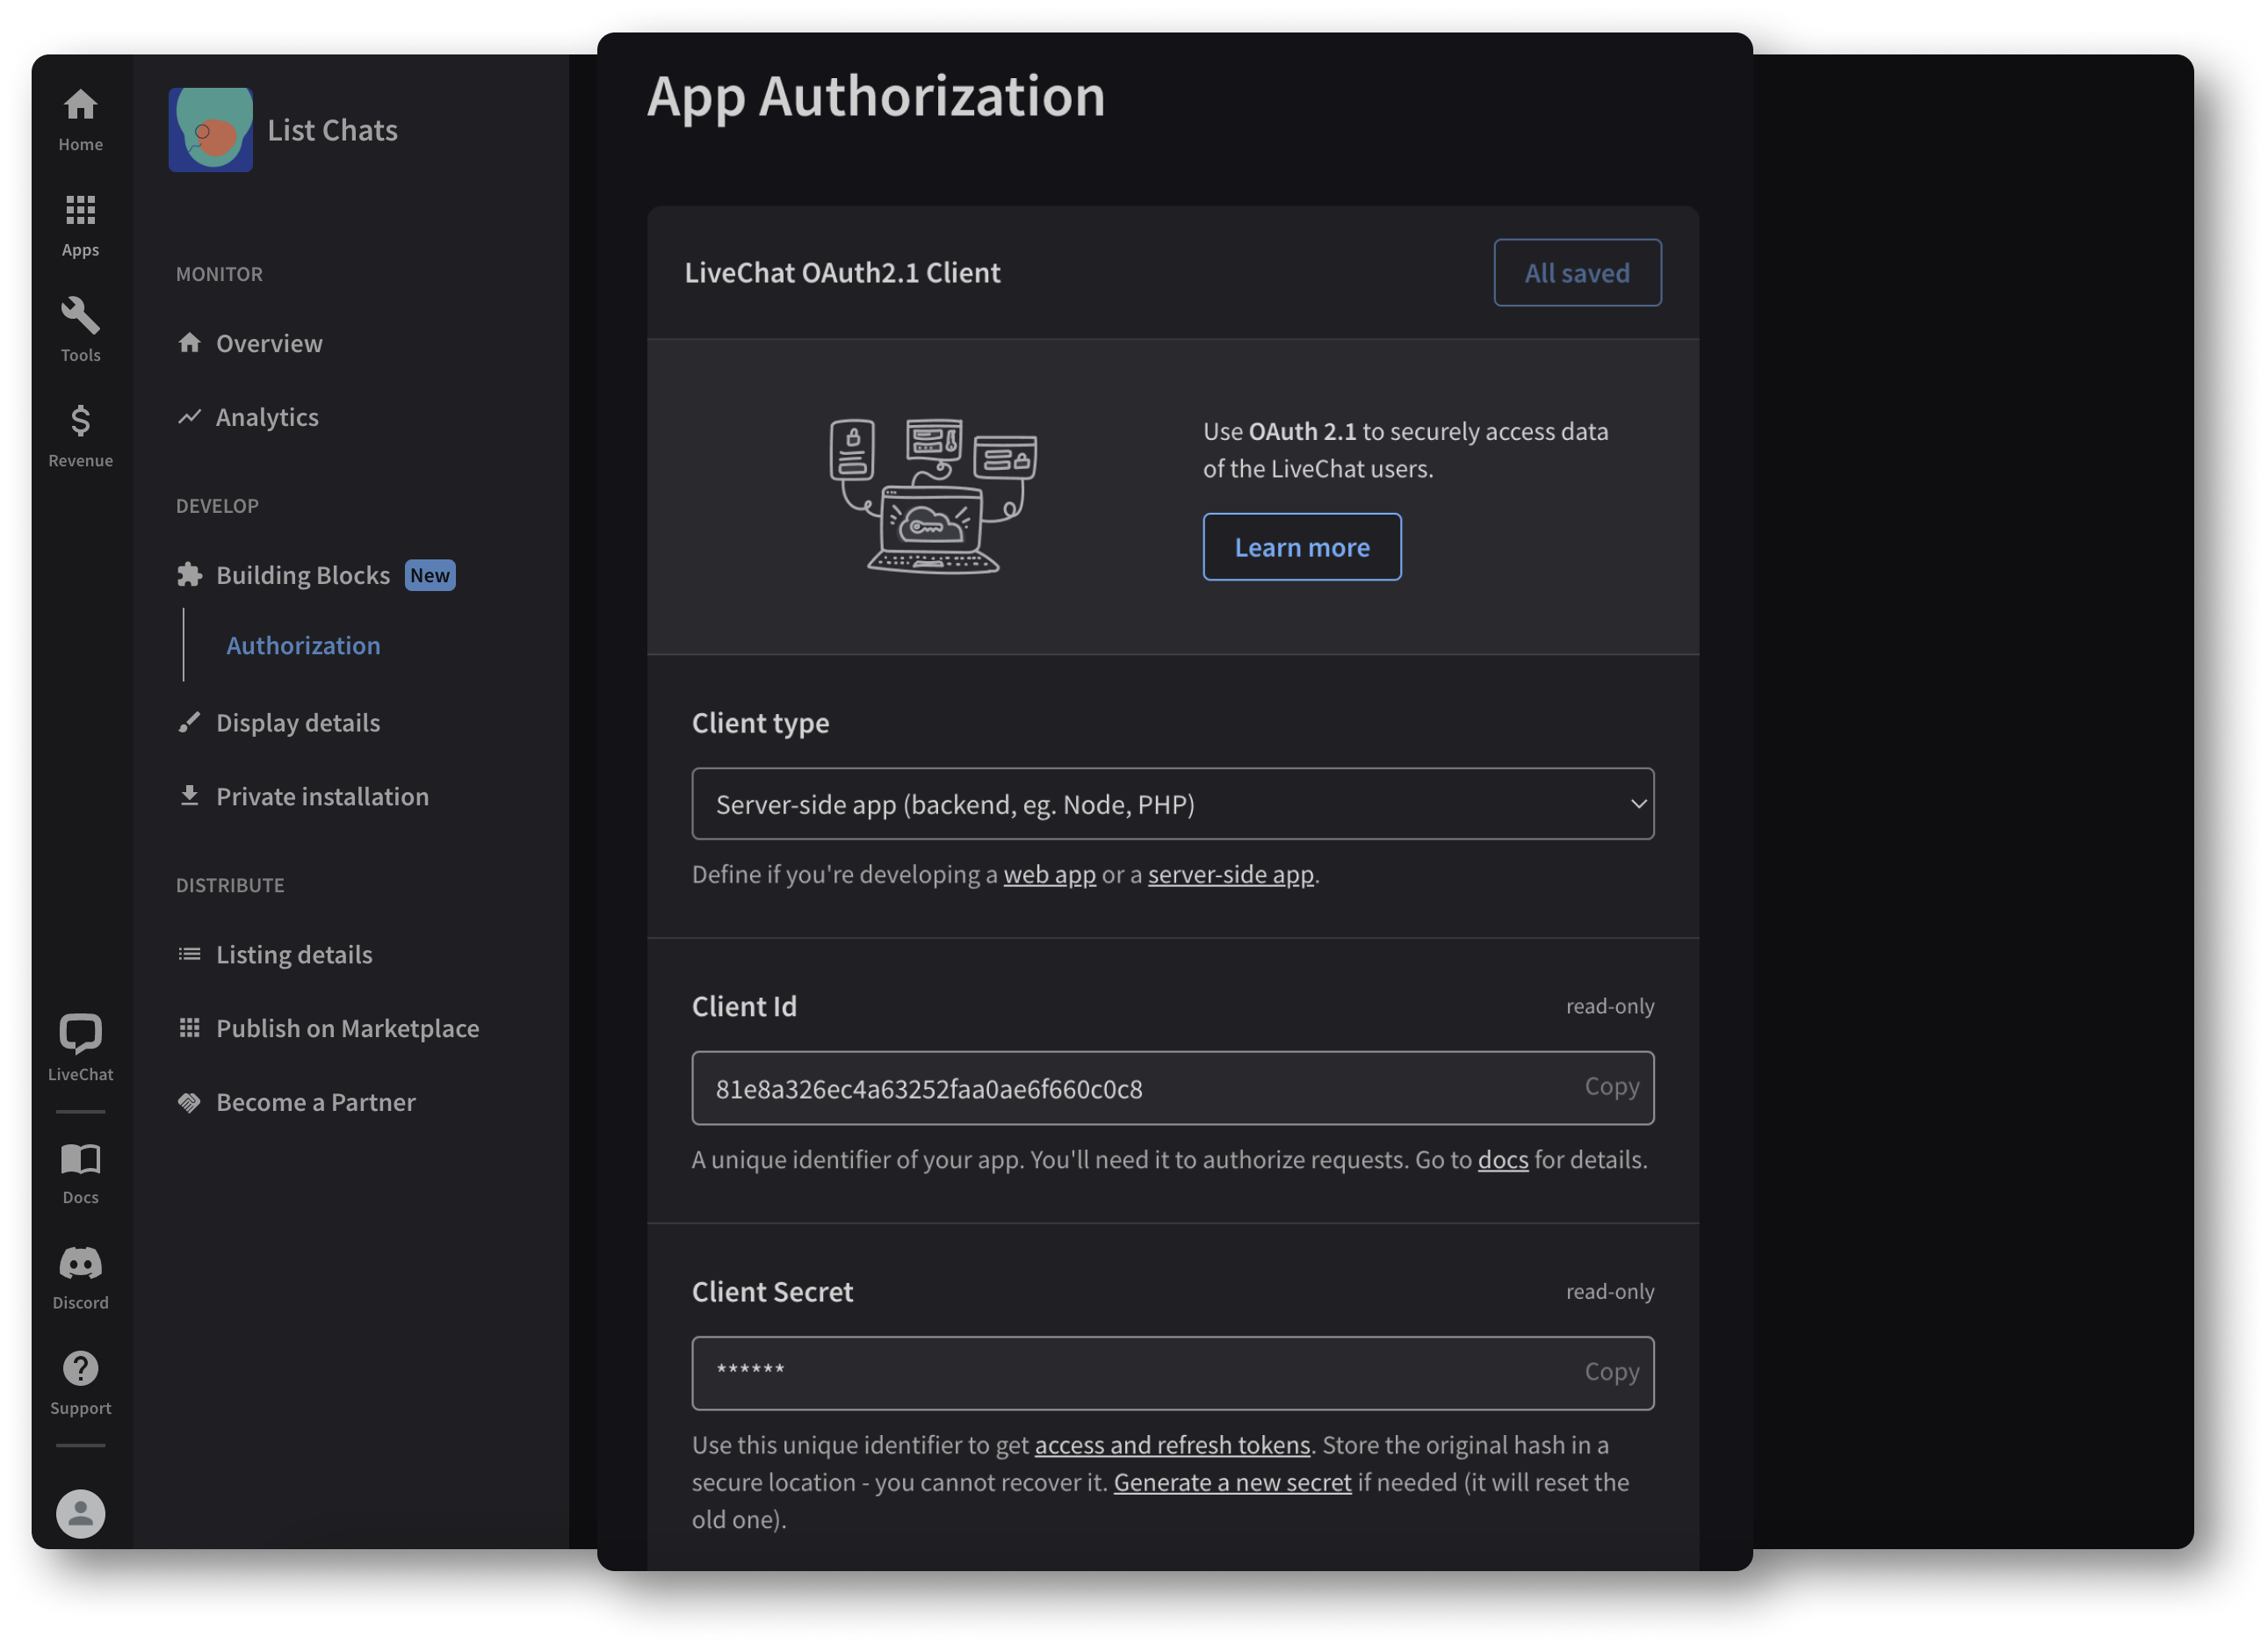
In the Authorization building block of your app, you'll find the fields you need to go through the authorization process:
- Client Id, which is the identifier of your app. It's considered public info.
- Client Secret, which is a confidential identifier. We will use it in Step 3. Copy it as it won't be visible once you refresh the page. Store it in a safe location. In production apps, Secret is usually stored on a server.
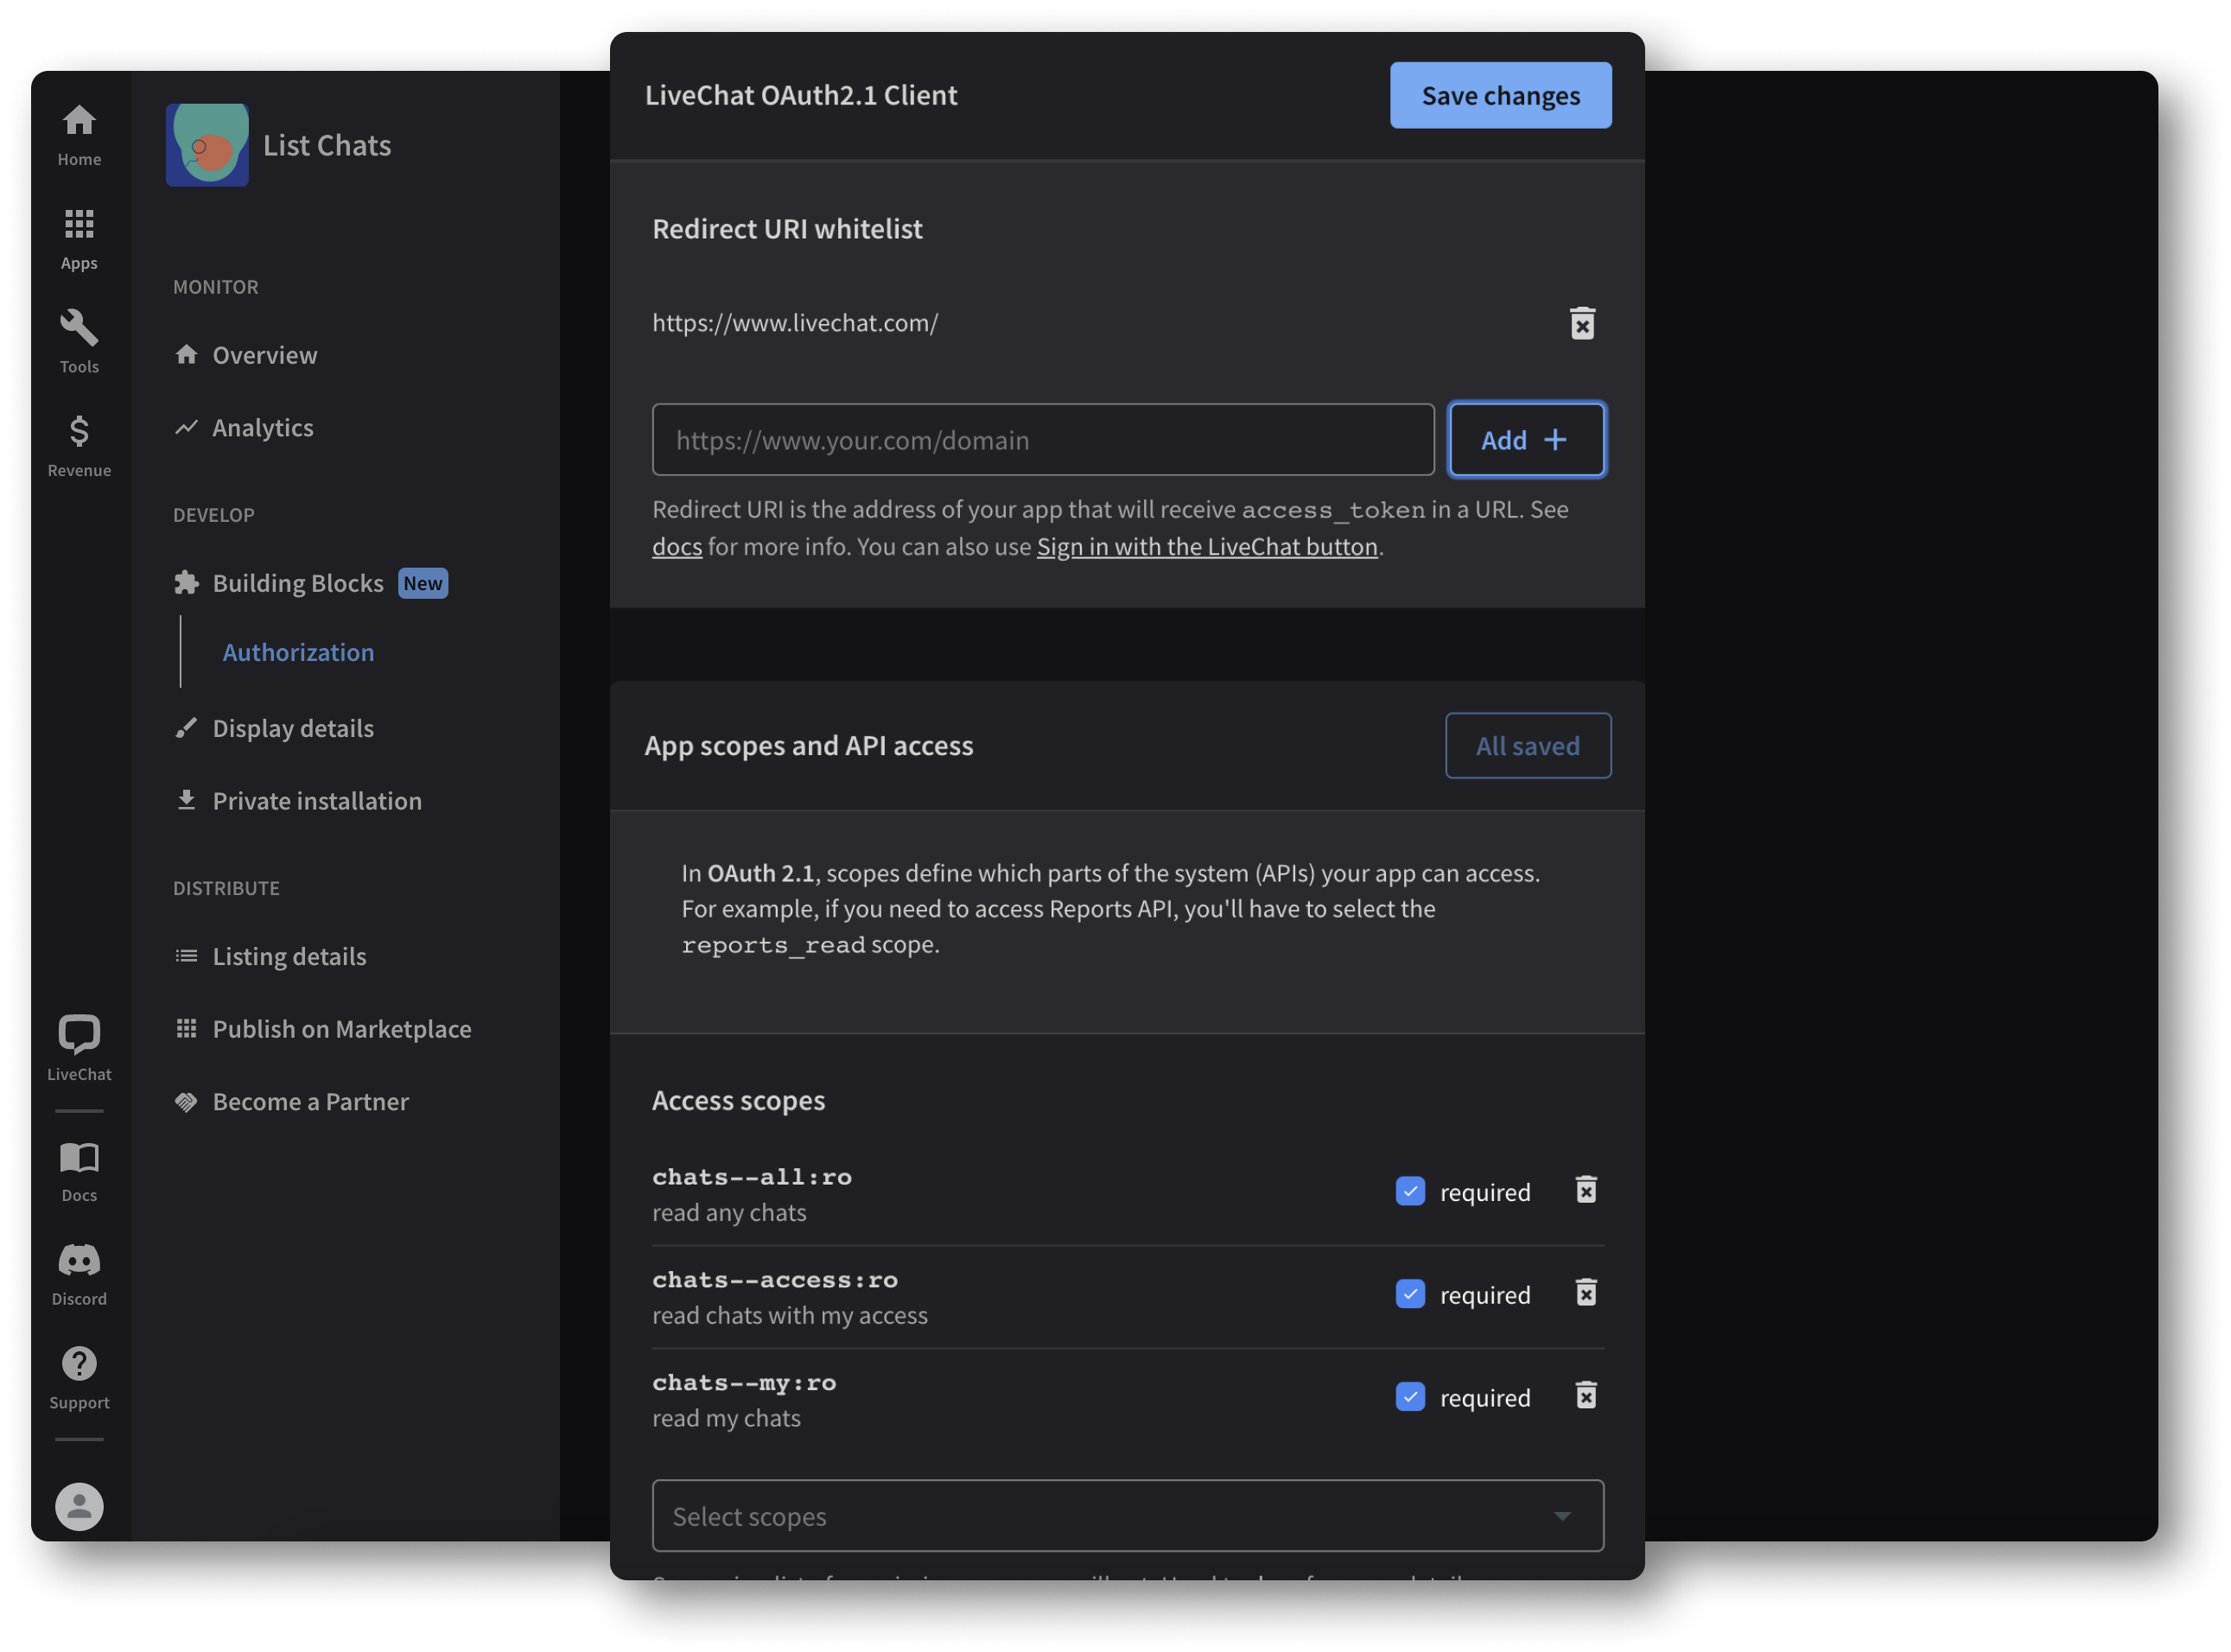
- Redirect URI whitelist - the address of your app that will receive the code and access token in a URL. Using only this address, one can acquire a code or token. App users will be redirected to this address after successful authorization.
- Access scopes - most methods require certain scopes. See the API documentation to find out what scope your app needs to use the List Chats method.
When it's all set, we can proceed with code generation. Make sure to have your Client Id, Client Secret, and Redirect URI at hand.
Step 2 Acquire the code
Start by pasting your Client Id and Redirect URI in the following request:
GENERAL REQUEST FORMAT https://accounts.livechat.com/
?response_type=code
&client_id=<CLIENT_ID_HERE>
&redirect_uri=<REDIRECT_URI_HERE>
For Client Id: 81e8a326ec4a63252faa0ae6f660c0c8 and Redirect URI: https://www.livechat.com/, the request looks like this:
https://accounts.livechat.com/
  ?response_type=code
  &client_id=81e8a326ec4a63252faa0ae6f660c0c8
  &redirect_uri=https://www.livechat.com/
Paste this snippet in the browser and copy the returned value. Make sure you're logged in to the exact same LiveChat account that was used to create the app in Developer Console. Otherwise, you'll be asked to log in first.
https://www.livechat.com/hello-again/?code=dal%3Ak0FTiZgtBkTLnzXlatwt6Fgvpp4&state=
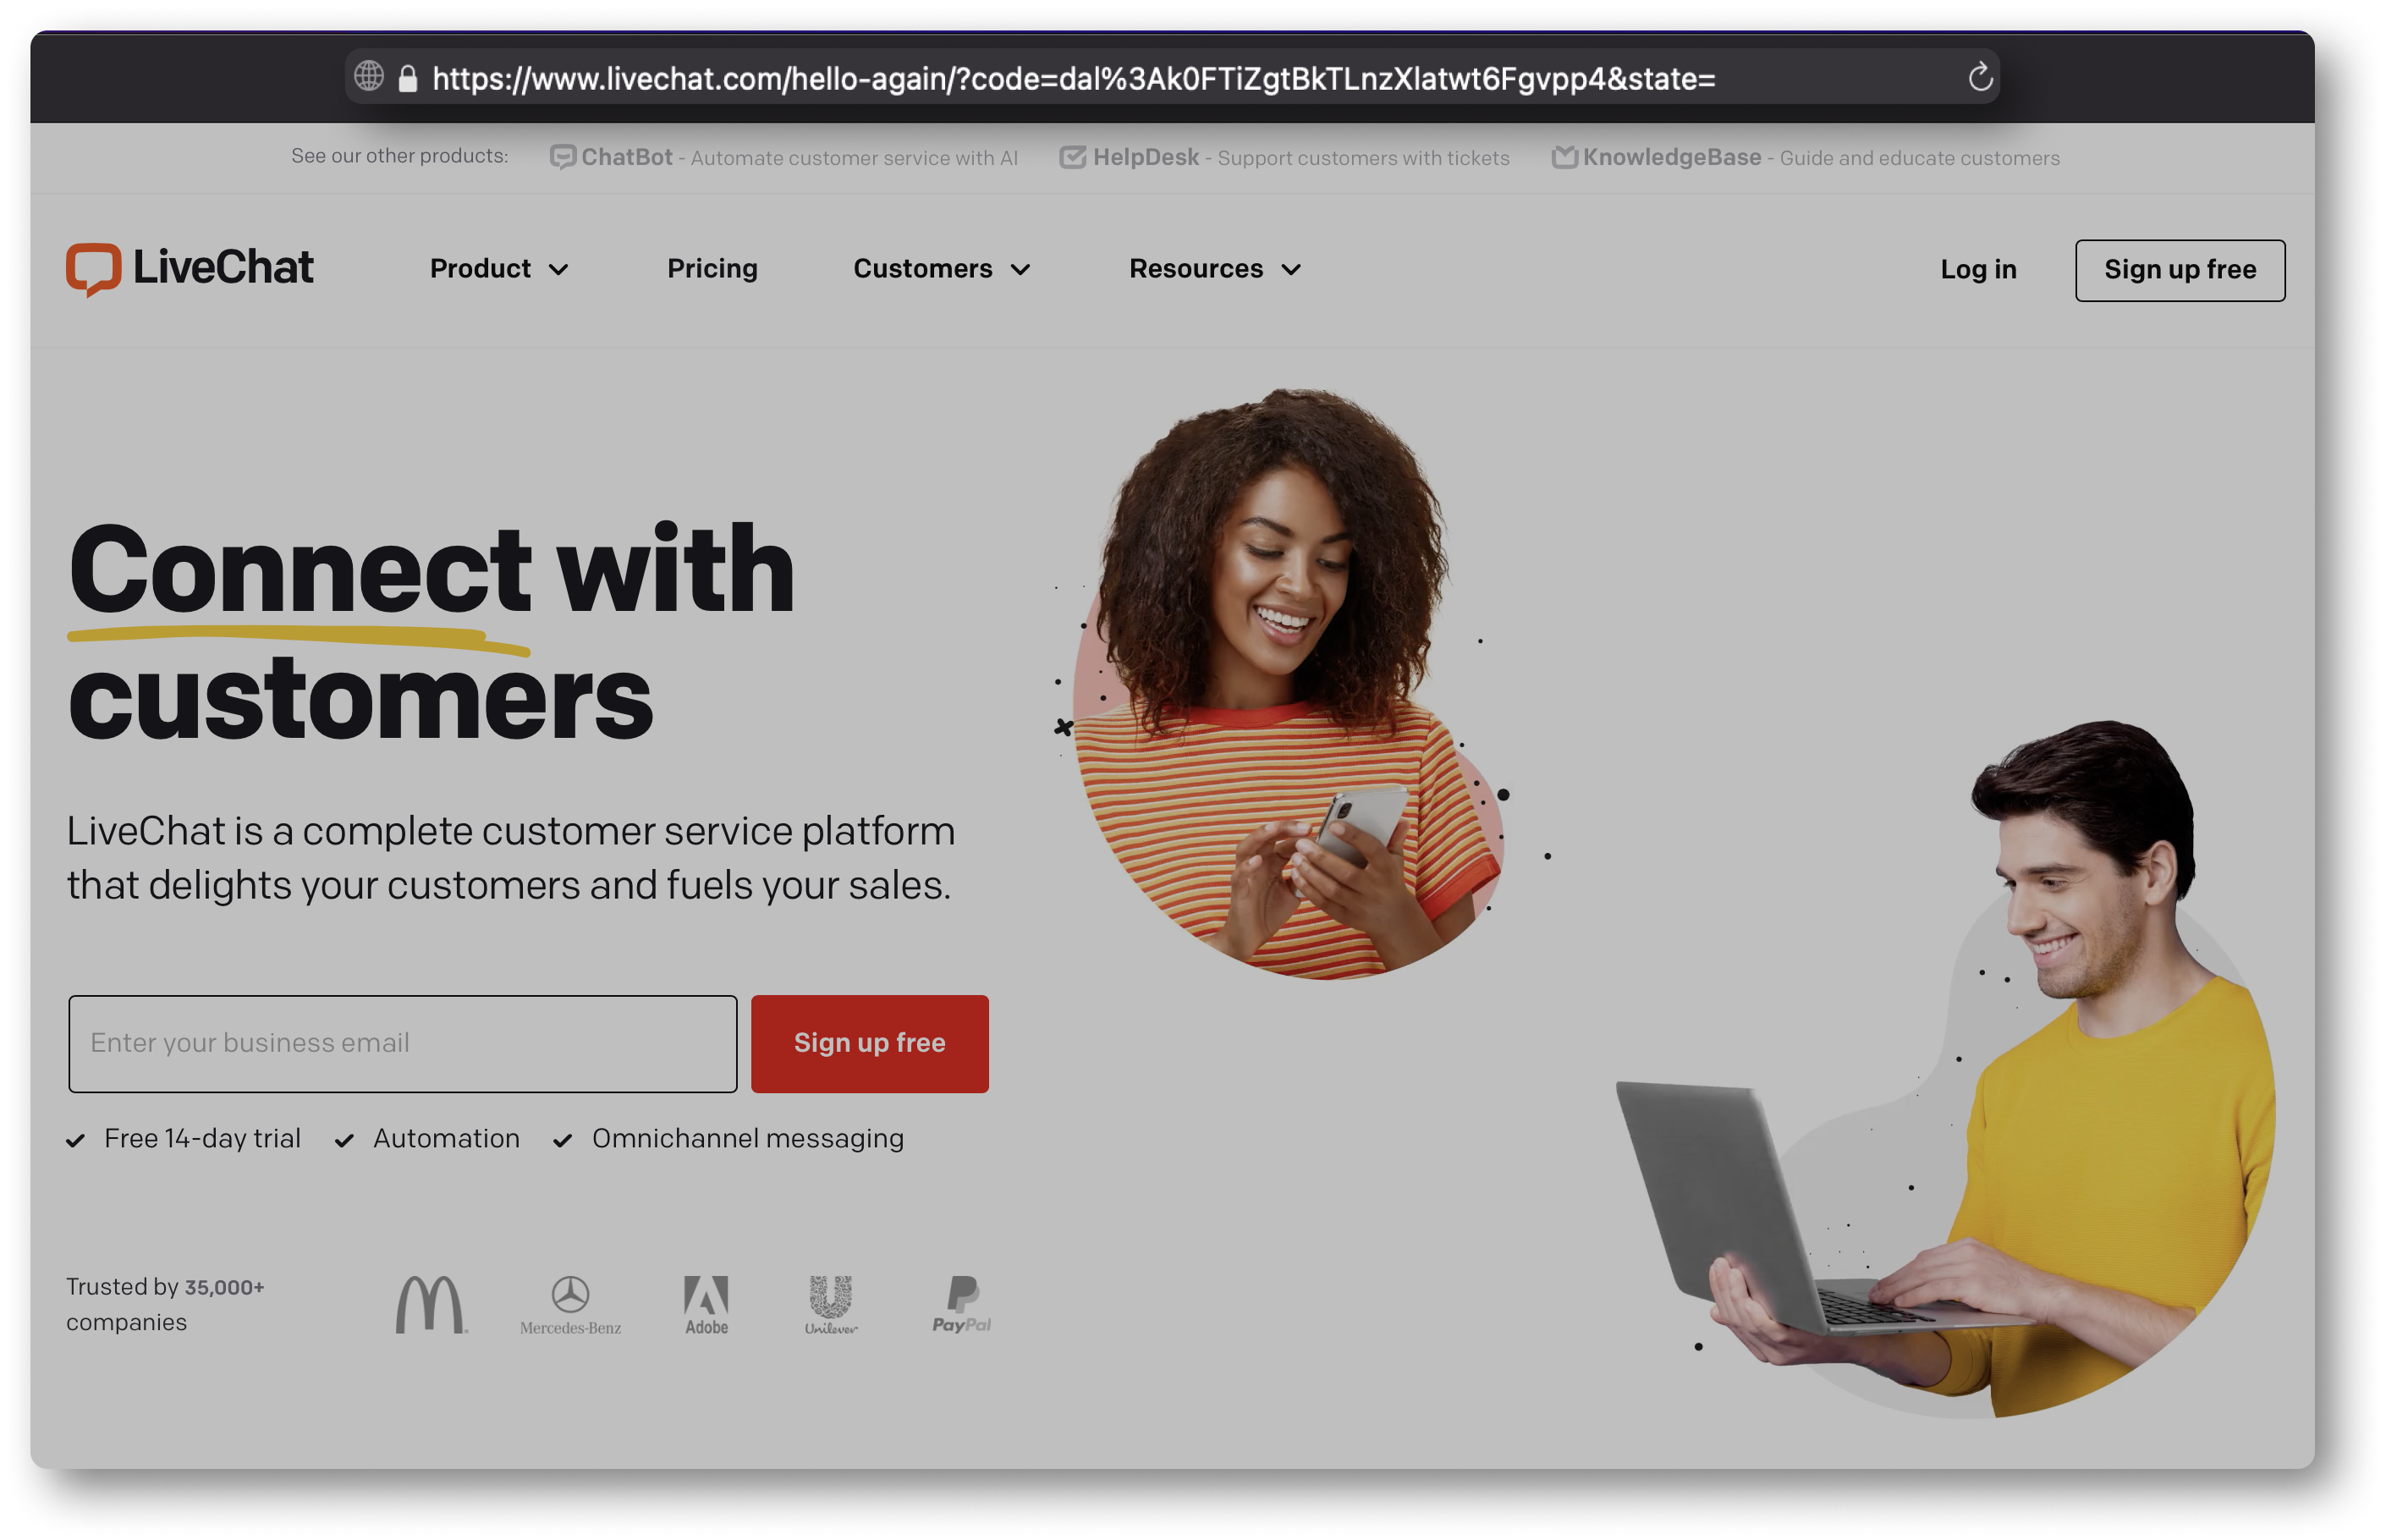
If you ever get a code or a token that contains %3A, change it to : (a colon). Normally, URL encoding replaces : with %3A. In that case, the code looks as follows:
dal:k0FTiZgtBkTLnzXlatwt6Fgvpp4
Normally, at this point during app installation, the app asks users to access certain resources of their accounts. If they agree, they are redirected to the Redirect URI defined in Developer Console with code in the response.
Step 3 Exchange the code for an access token
Now we have to exchange code for token to authenticate the identity of our application.
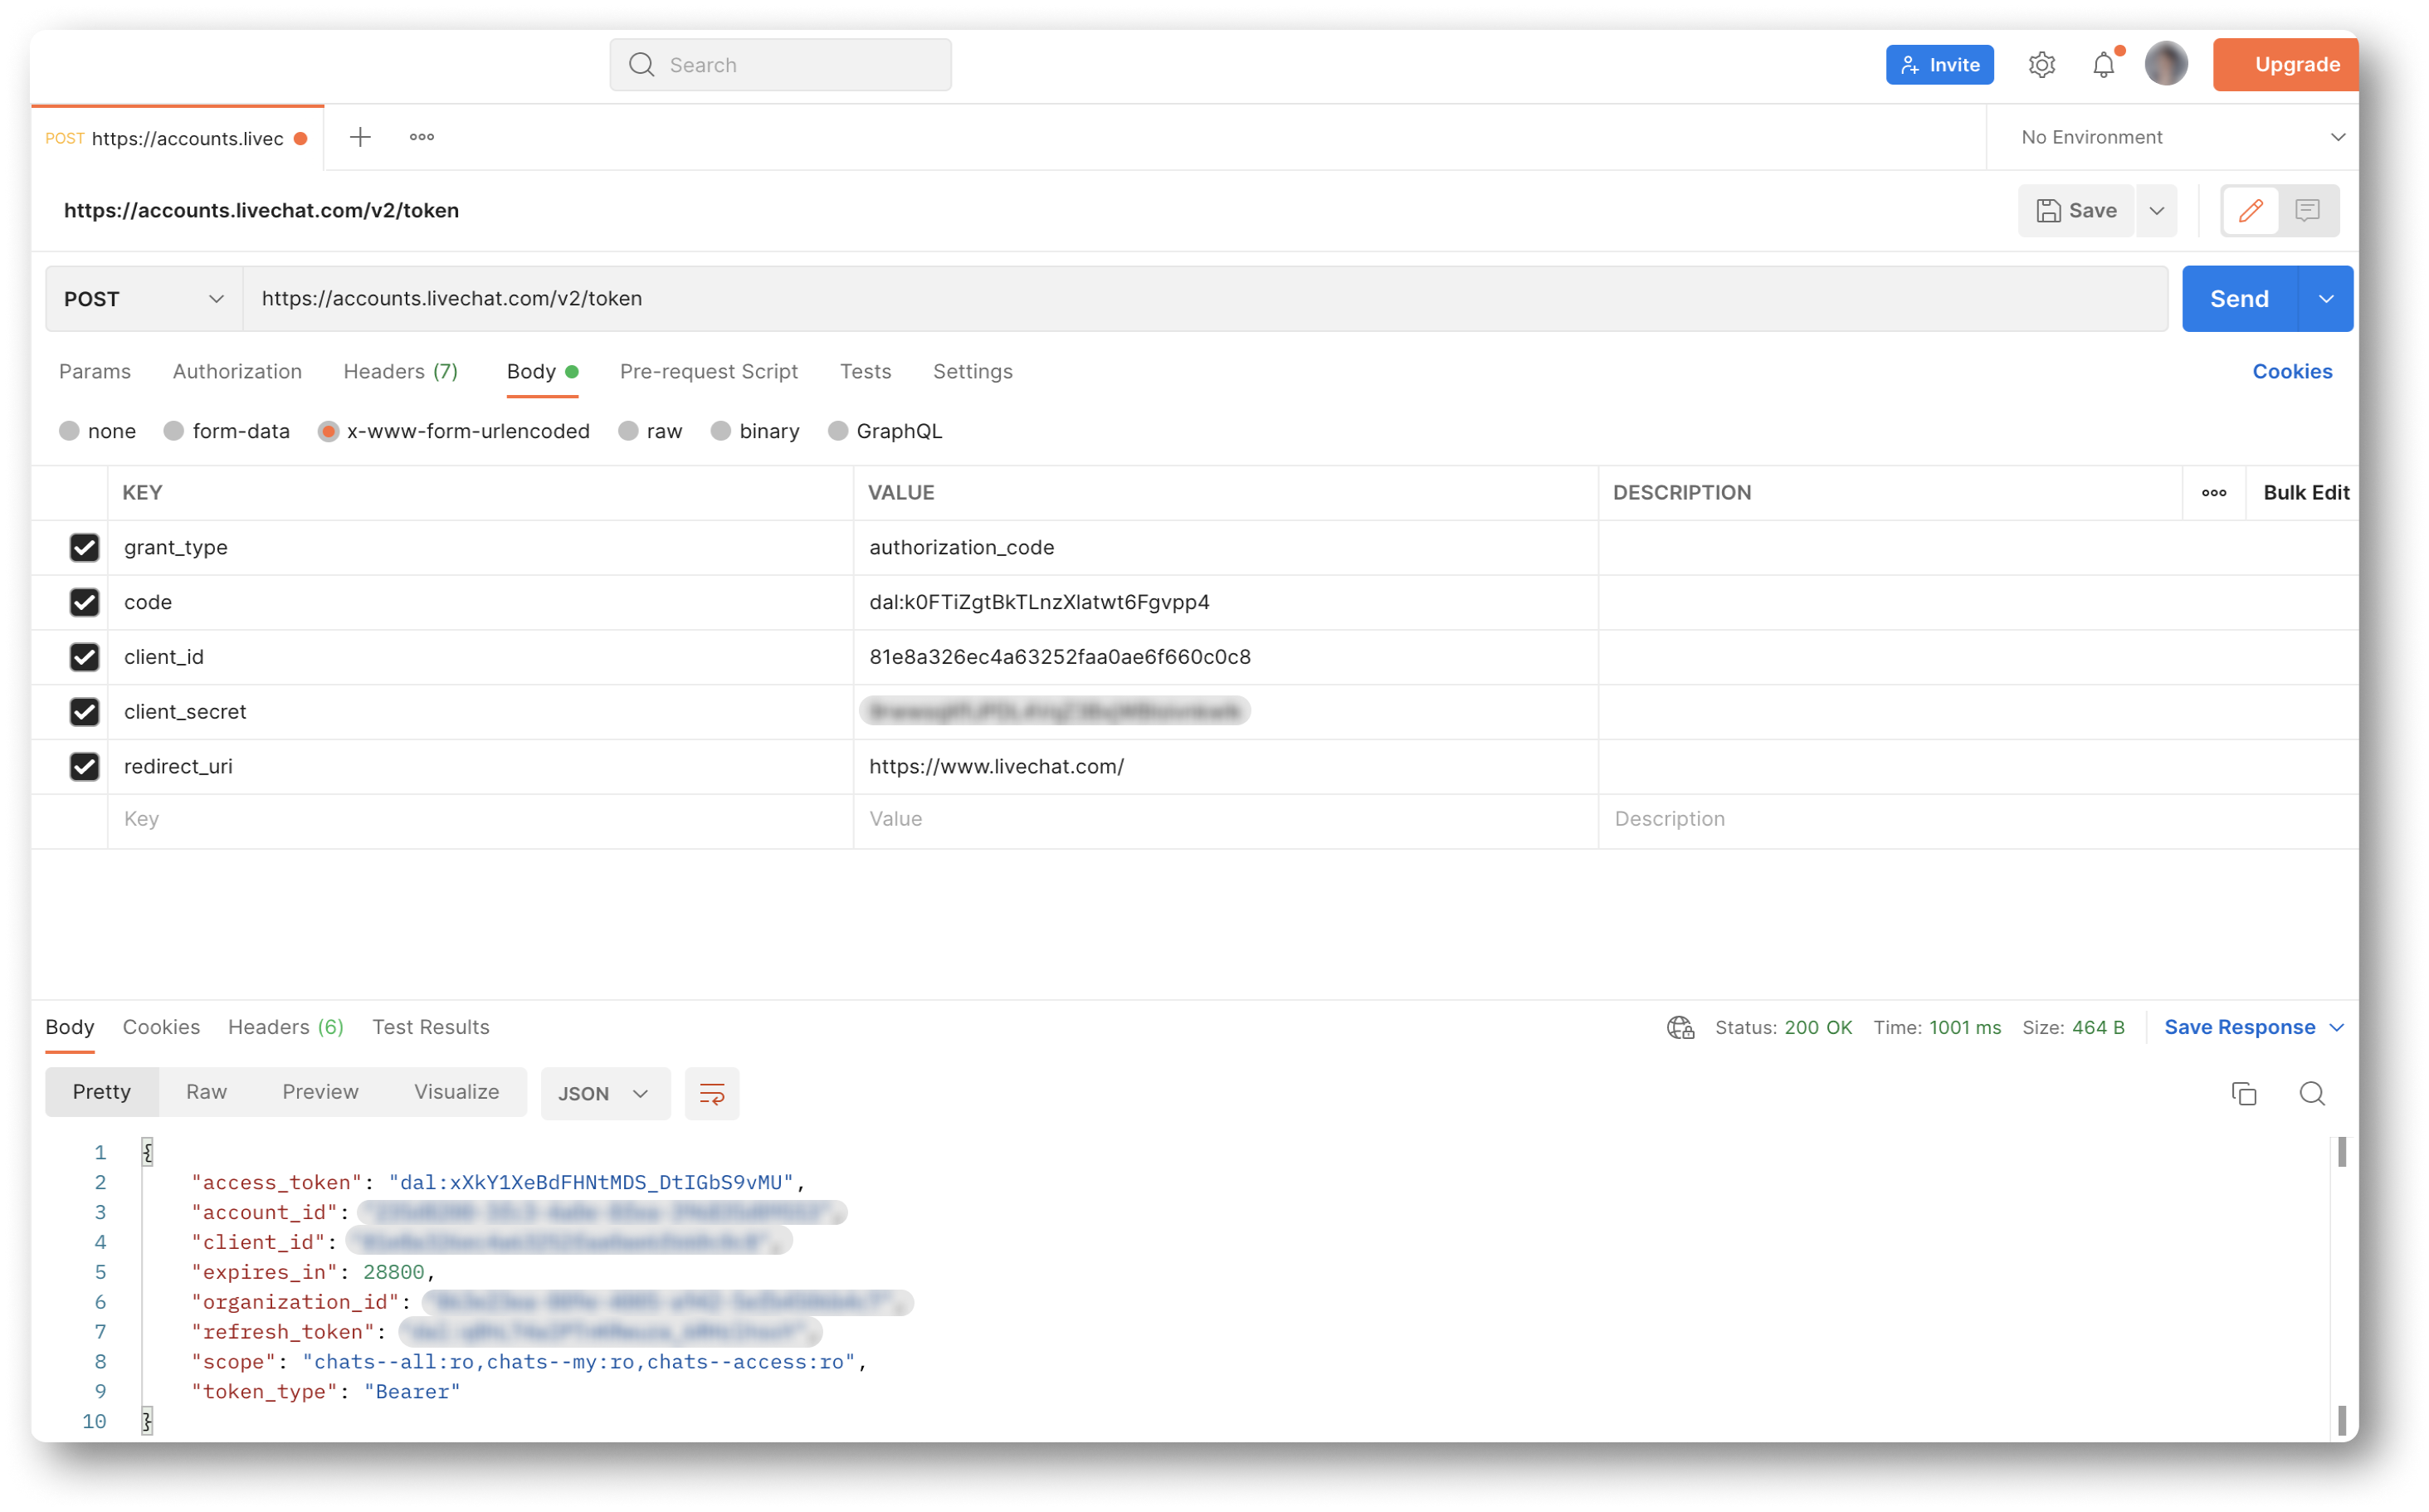
To do that, we'll send an HTTP POST request providing code, Client Id, Client Secret, and Redirect URI. We'll use Postman. You can read more about exchanging code for access token and refresh token here. Please remember to replace sample parameters with your own.
GENERAL REQUEST FORMAT curl "https://accounts.livechat.com/v2/token" \
-X POST \
-d "grant_type=authorization_code&\
code=YOUR_CODE_HERE&\
client_id=YOUR_ID_HERE&\
client_secret=YOUR_SECRET_HERE&\
redirect_uri=YOUR_redirect_HERE"
You'll get an object with not only the access token, but also the refresh token, scopes, expiration time, and other.
You can find all the requests from the Agent authorization flow in our Postman collection. Don't forget to replace sample parameters with your own.

Remember the access token doesn't belong to you as an agent. It's the token of your application - that's why you specify Client Id in the request.
Learn more about Agent authorization flow, and if you're struggling with errors, check out Authorization FAQ, where we tackle the most common problems.
Step 4 Send a request
Managed to get your token? Great! You can now use it to authorize the request sent the List Chats request.
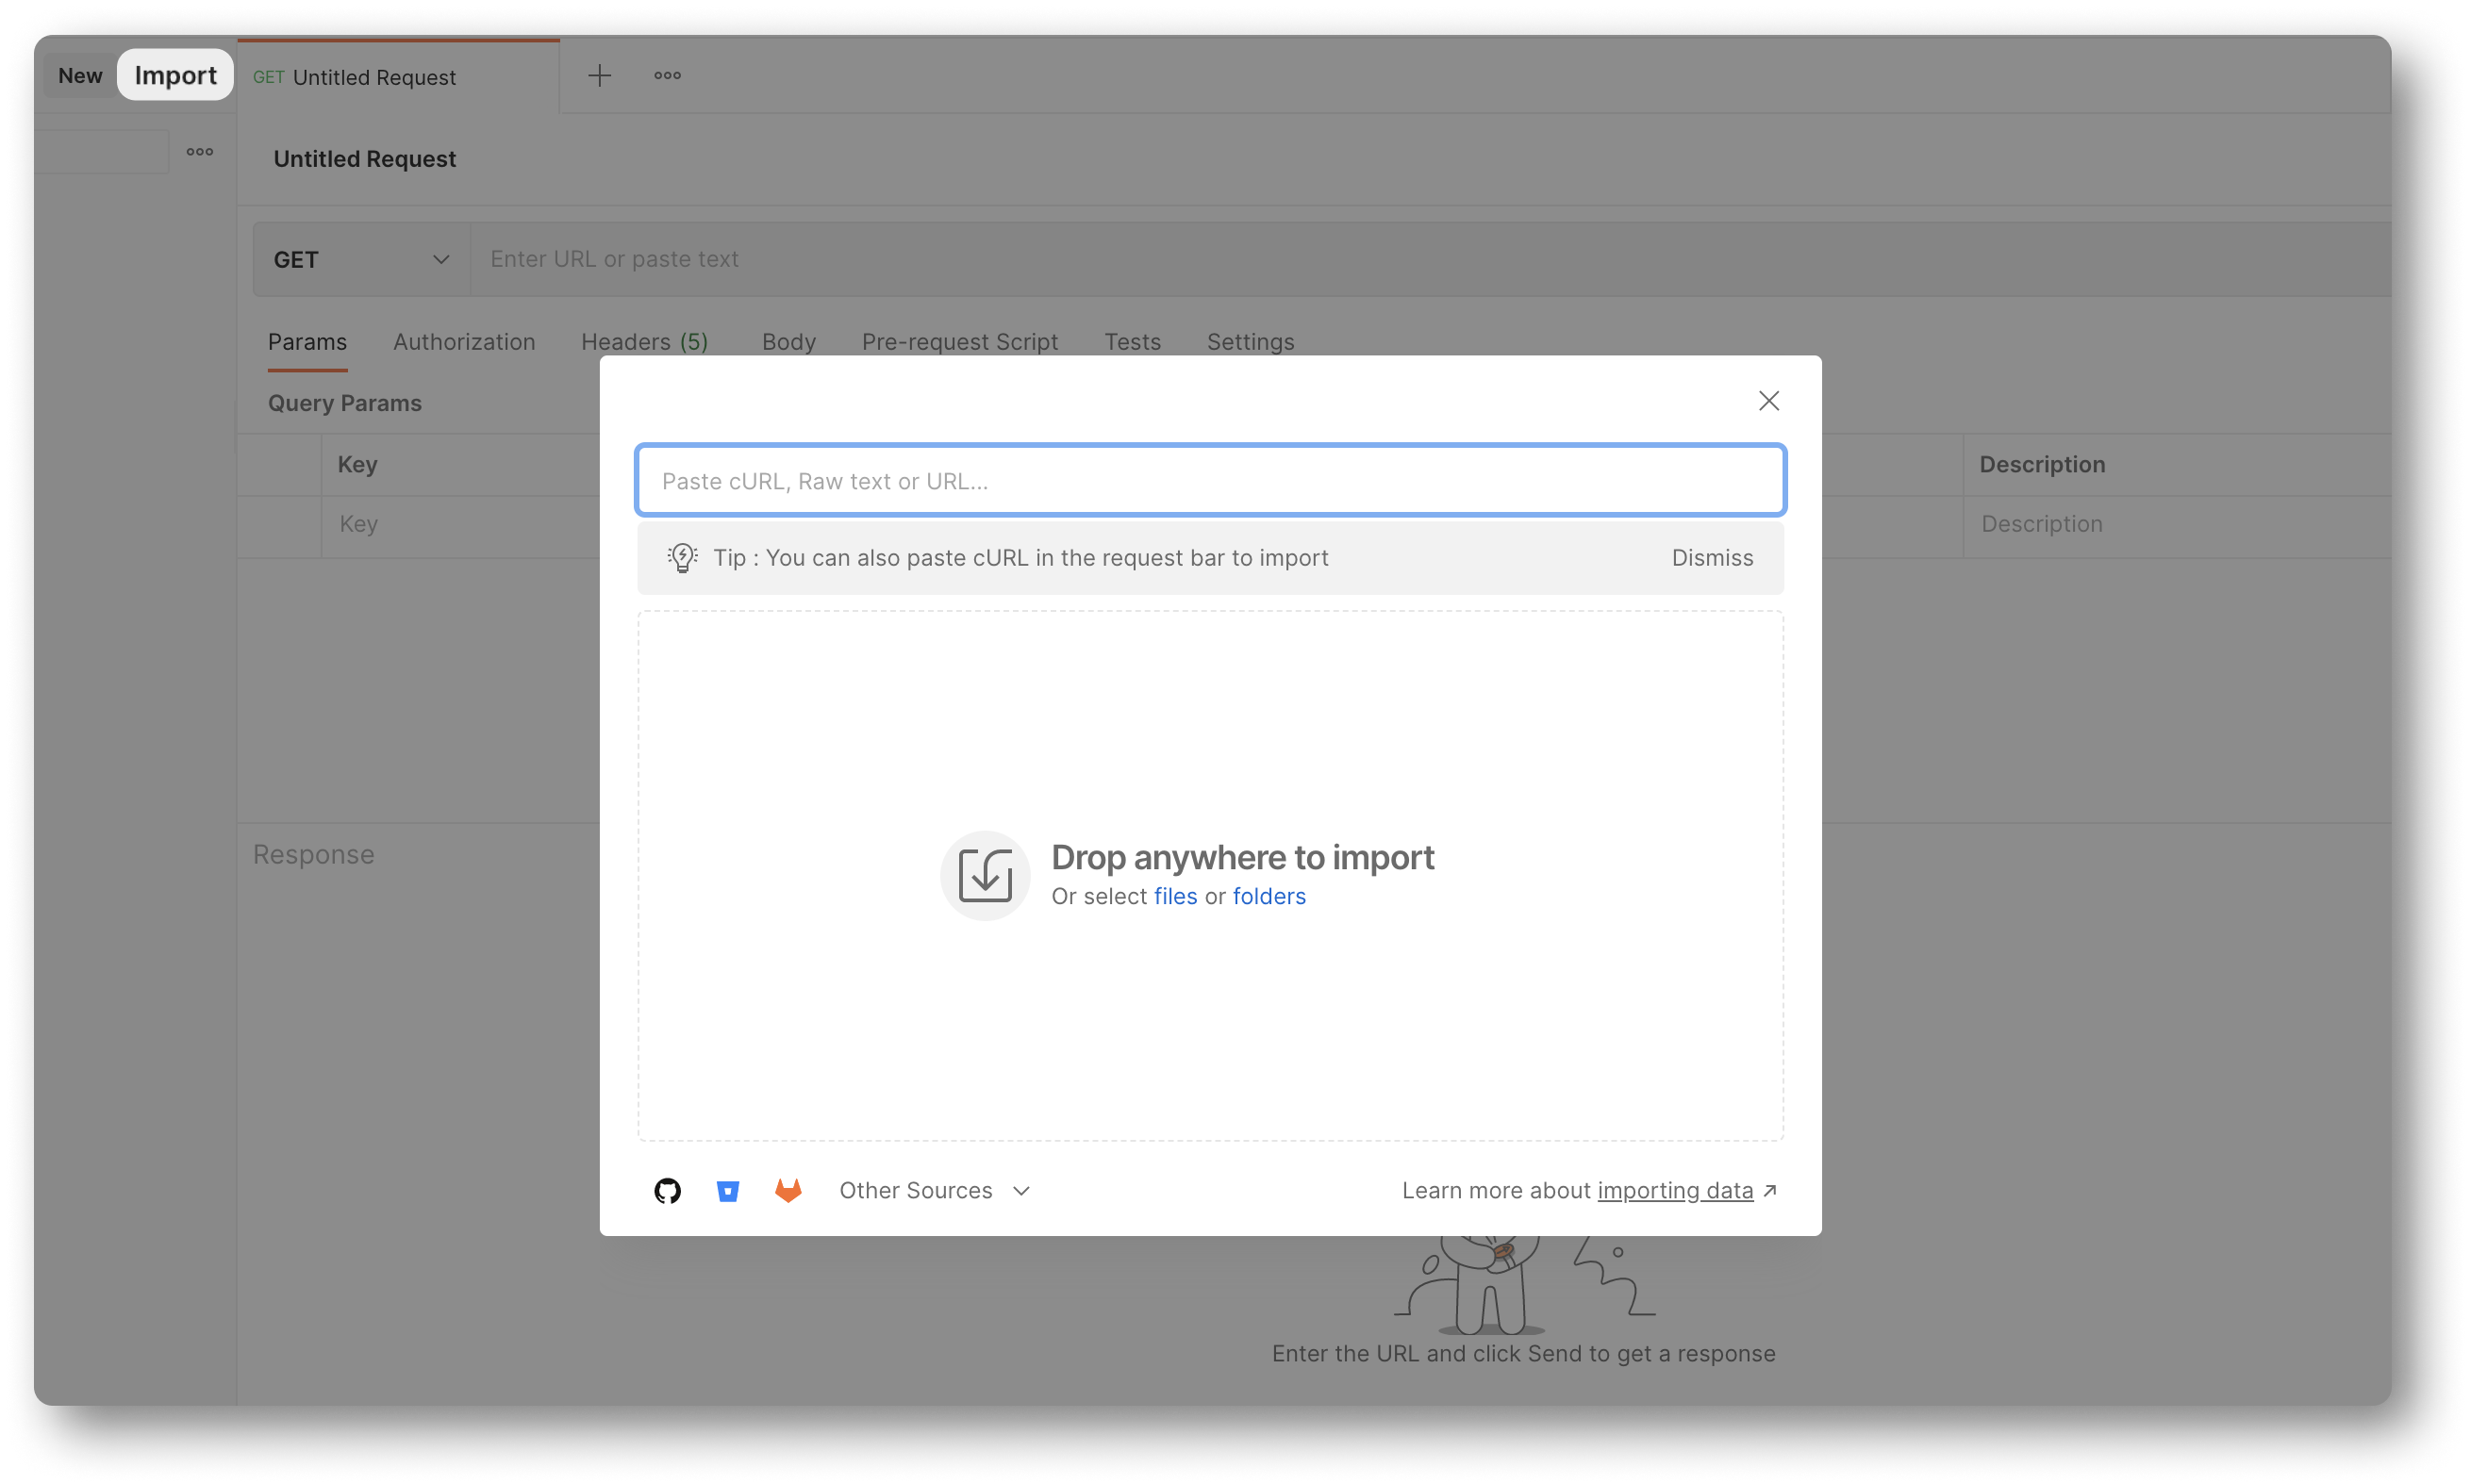
Go to List Chats in our documentation and copy the request code snippet. Once more, we'll use Postman and its Import > Paste Raw Text option. After importing, replace <your_access-token> with the actual token.
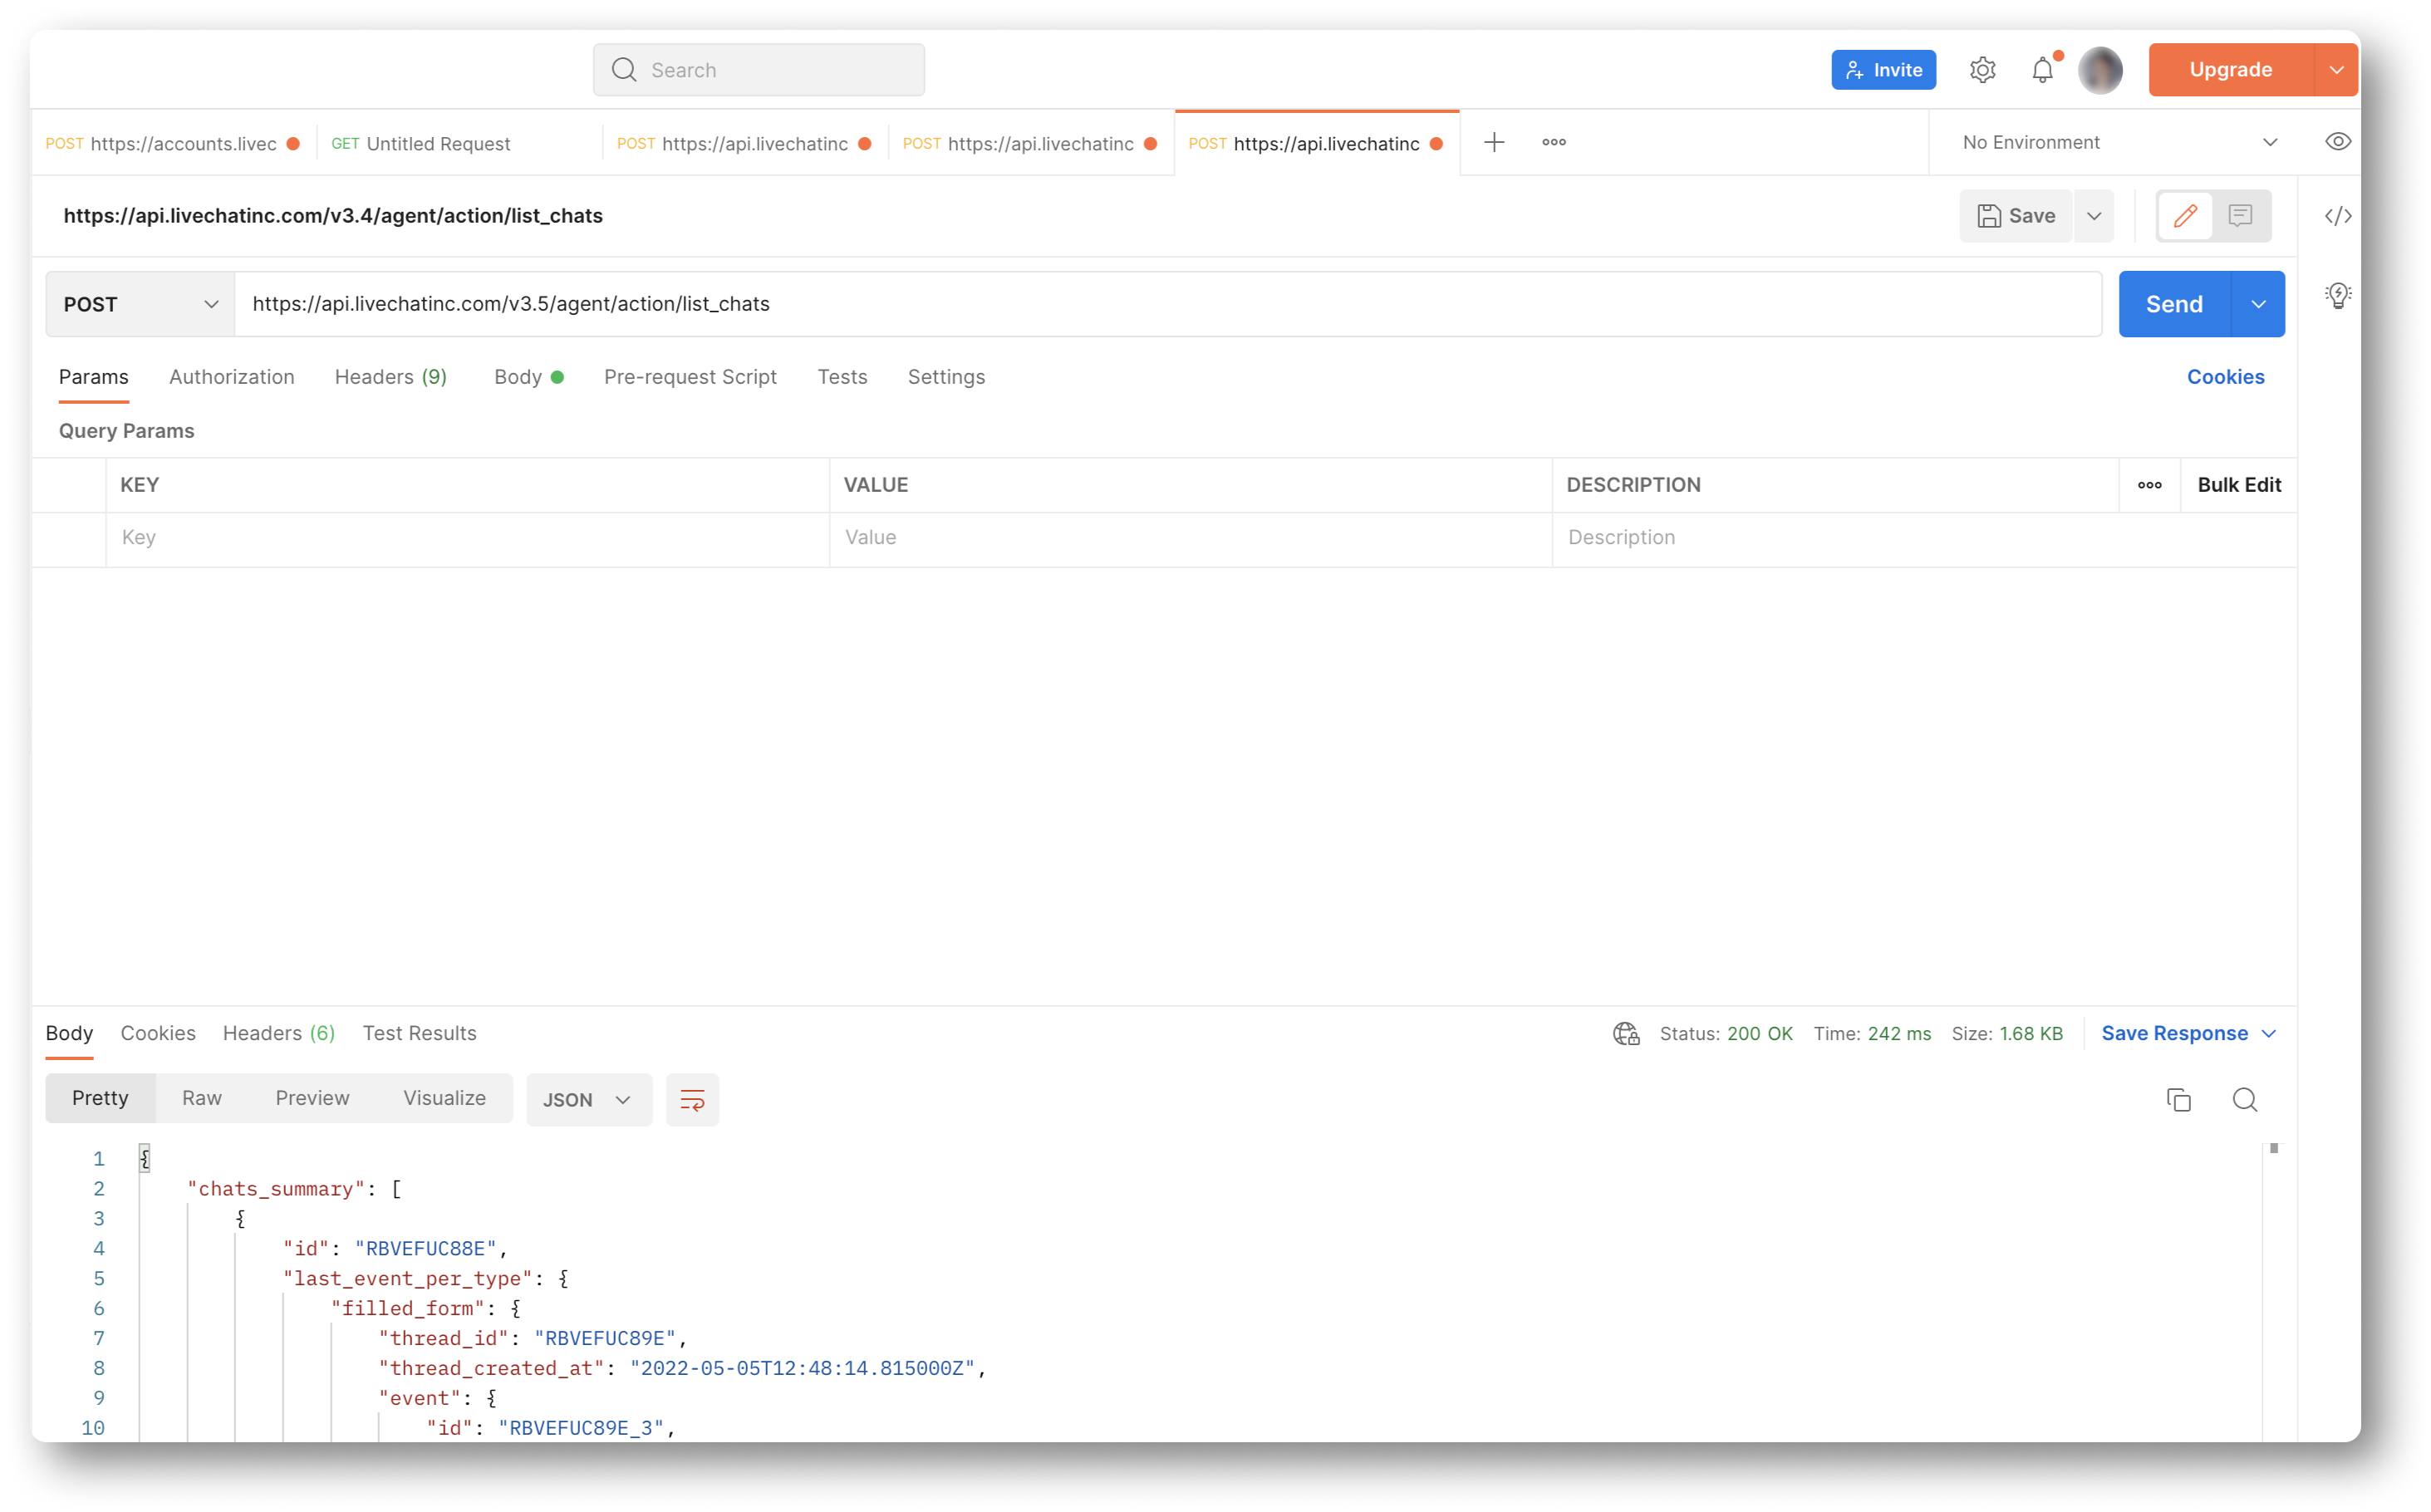
Once you click Send, you should be able to get the response:
All the requests from the Agent authorization flow can be found in our Postman collection. Don't forget to replace sample parameters with your own.
Questions?
And that would be about it! We hope you managed to successfully send the request. You can use your access token for other methods from the Agent Chat and Configuration APIs. Remember that you cannot use the same token for Customer Chat API. Instead, use the token you have for creating a customer, and acquire a new one. In case of doubts, make sure to check out our documentation. You can always reach out to us at developers@text.com.